
By Jamie Cartwright, from HubSpot Marketing Blog – http://bit.ly/1KpEE3s
I like to think of Microsoft PowerPoint as a test of basic marketing skills. To create a passing presentation, I need to demonstrate design skills, technical literacy, and a sense of personal style.
If the presentation has a problem (like an unintended font, a broken link, or unreadable text), then I’ve probably failed the test. Even if my spoken presentation is well rehearsed, a bad visual experience can ruin it for the audience. Expertise means nothing without a good presentation to back it up.
No matter your topic, successful PowerPoints depend on three main factors: your command of PowerPoint’s design tools, your attention to presentation processes, and your devotion to consistent style. Here are some simple tips to help you start mastering each of those factors, and don’t forget to check out the additional resources at the bottom of this post.
Get started creating effective PowerPoint presentations by downloading our 3 free PowerPoint PPT templates here.
PowerPoint Presentation Style Tips
1) Don’t let PowerPoint decide how you use PowerPoint.
Microsoft wanted to provide PowerPoint users with a lot of tools. But this does not mean you should use them all. Here are some key things to look out for:
- Make sure that preset PPT themes complement your needs before you adopt them.
- Try to get away from using Microsoft Office’s default fonts, Calibri and Cambria. Using these two typefaces can make the presentation seem underwhelming.
- Professionals should never use PPT’s action sounds. (Please consider your audience above personal preference).
- PowerPoint makes bulleting automatic, but ask yourself: Are bullets actually appropriate for what you need to do? Sometimes they are, but not always.
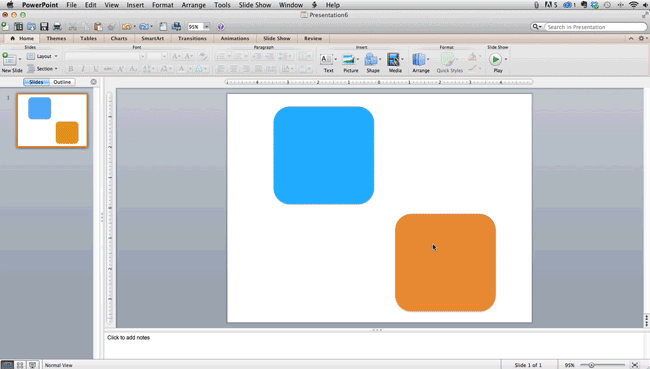
- Recent PPT defaults include a small shadow on all shapes. Remove this shadow if it’s not actually needed. Also, don’t leave shapes in their default blue.
2) Create custom slide sizes.
While you usually can get away with the default slide size for most presentations, you may need to adjust it for larger presentations on weirdly sized displays. If you need to do that, here’s how.
- In the top-left corner, choose “File.”
- Select “Page Setup.”
- Type the height and width of the background you’d like, and click “OK.”
- A dialogue box will appear. Click “OK” again.
- Your background is resized!
Tip: Resize your slides before you add any objects to them or the dimensions of your objects will become skewed.
3) Edit your slide template design.
Often, it’s much easier to edit your PowerPoint template before you start — this way, you don’t have design each slide by hand. Here’s how you do that.
- Select “Themes” in the top navigation.
- In the far right, click “Edit Master,” then “Slide Master.”
- Make any changes you like, then click “Close Master.” All current and future slides in that presentation will use that template.
4) Make sure all of your objects are properly aligned.
Having properly aligned objects on your slide is the key to making it look polished and professional. You can manually try to line up your images … but we all know how that typically works out. You’re trying to make sure all of your objects hang out in the middle of your slide, but when you drag them there, it still doesn’t look quite right. Get rid of your guessing game and let PowerPoint work its magic with this trick.
How to align multiple objects:
- Select all objects by holding down “Shift” and clicking on all of them.
- Select “Arrange” in the top options bar, then choose “Align or Distribute.”
- Choose the type of alignment you’d like.

How to align objects to the slide:
- Select all objects by holding down “Shift” and clicking on all of them.
- Select “Arrange” in the top options bar, then choose “Align or Distribute.”
- Select “Align to Slide.”
- Select “Arrange” in the top options bar again, then choose “Align or Distribute.”
- Choose the type of alignment you’d like.
PowerPoint Presentation Design Tips
5) Get more control over your objects’ designs using “Format” menus.
Format menus allow you to do fine adjustments that otherwise seem impossible. To do this, right click on an object and select the “Format” option. Here, you can fine-tune shadows, adjust shape measurements, create reflections, and much more. The menu that will pop up looks like this:
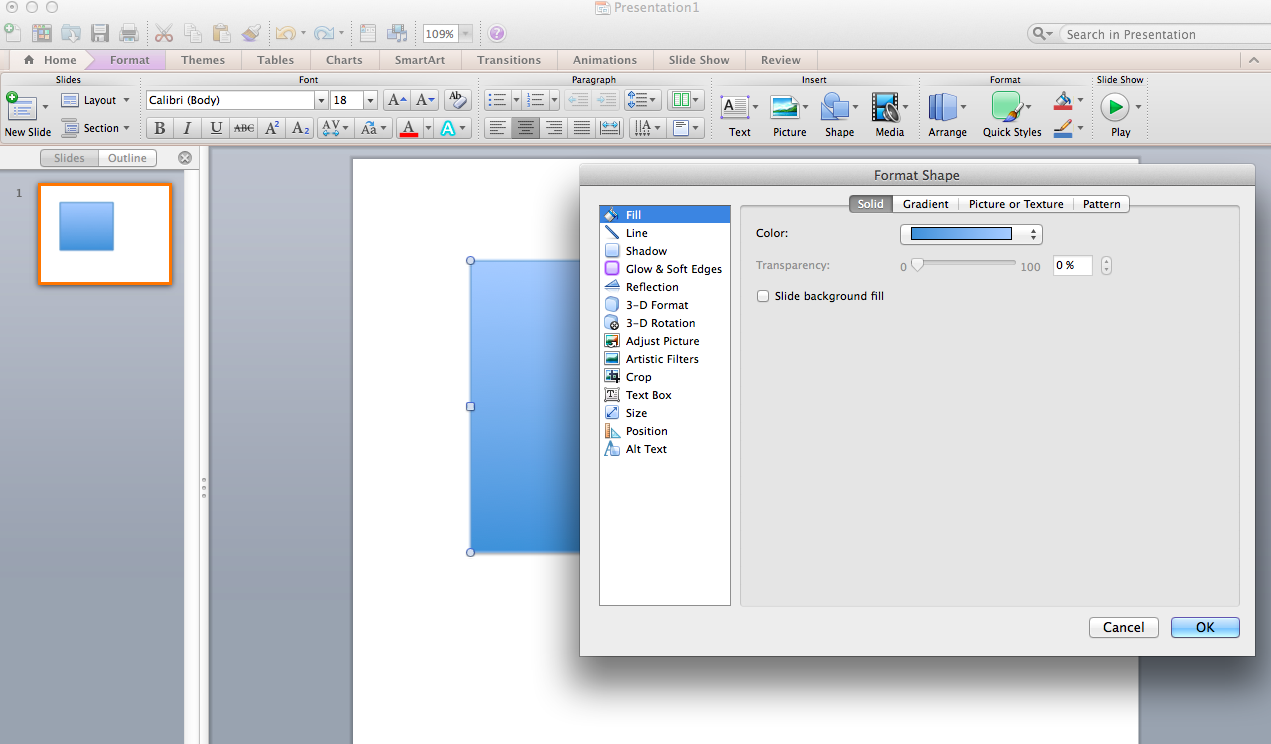
Although the main options can be found on PowerPoint’s format toolbars, look for complete control in the format window menu. Other examples of options available include:
- Adjusting text inside a shape.
- Creating a natural perspective shadow behind an object.
- Recoloring photos manually and with automatic options.
6) Take advantage of PowerPoint’s shapes.
Many users don’t realize how flexible PowerPoint’s shape tools have become. In combination with the expanded format options released by Microsoft in 2010, the potential for good design with shapes is readily available. PowerPoint provides the user with a bunch of great shape options beyond the traditional rectangle, oval, and rounded rectangle patterns, unlike even professional design programs like Adobe Creative Suite or Quark.
Today’s shapes include a highly functional Smart Shapes function, which enables you to create diagrams and flow charts in no time. These tools are especially valuable when you consider that PowerPoint is a visual medium. Paragraphing and bullet lists are boring — you can use shapes to help express your message more clearly.
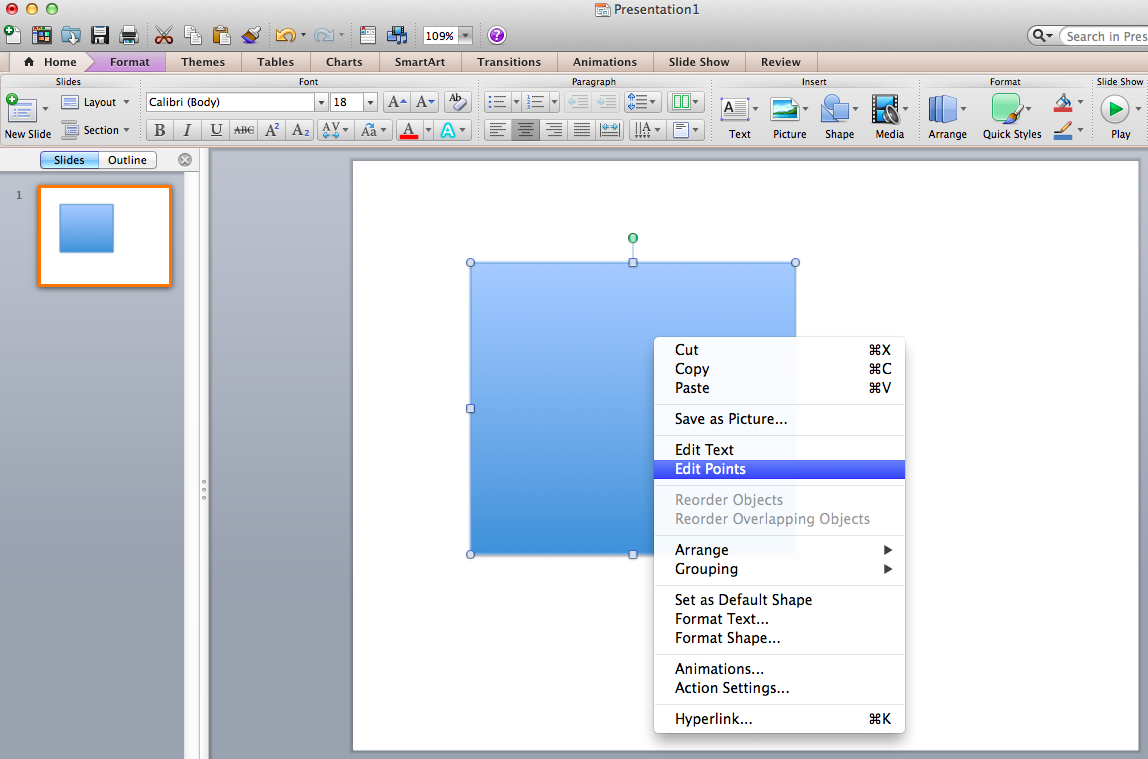
7) Create custom shapes.
When you create a shape, right click and press “Edit Points.” By editing points, you can create custom shapes that fit your specific need. For instance, you can reshape arrows to fit the dimensions you like.
Another option is to combine two shapes together. When selecting two shapes, right-click and go to the “Grouping” sub-menu to see a variety of options.
- Combine creates a custom shape that has overlapping portions of the two previous shapes cut out.
- Union makes one completely merged shape.
- Intersect builds a shape of only the overlapping sections of the two previous shapes.
- Subtract cuts out the overlapping portion of one shape from the other.
8) Crop images into custom shapes.
Besides creating custom shapes in your presentation, you can also use PowerPoint to crop existing images into new shapes. Here’s how you do that:
- Click on the image and select “Format” in the options bar.
- Choose “Crop,” then “Mask to Shape,” and then choose your desired shape. Ta-da! Custom-shaped photos.
9) Present websites within PowerPoint.
Tradition says that if you want to show a website in a PowerPoint, you should just create link to the page and prompt a browser to open. For PC users, there’s a better option.
Third party software that integrates fully into PowerPoint’s developer tab can be used to embed a website directly into your PowerPoint using a normal HTML iframe. One of the best tools is LiveWeb, a third-party software developed independently.
By using LiveWeb, you don’t have to interrupt your PowerPoint, and your presentation will remain fluid and natural. Whether you embed a whole webpage or just a YouTube video, this can be a high-quality third party improvement.
Unfortunately, Mac users don’t have a similar option. A good second choice is to take screen shots of the website, link in through a browser, or embed media (such as a YouTube video) by downloading it directly to your computer.
PowerPoint Presentation Process Tips
10) Embed your font files.
One constant problem presenters have with PowerPoint is that fonts seem to change when presenters move from one computer to another. In reality, the fonts are not changing — the presentation computer just doesn’t have the same font files installed. If you’re using a PC and presenting on a PC, then there is a smooth work around for this issue. (When you involve Mac systems, the solution is a bit rougher. See Tip #11.)
Here’s the trick: When you save your PowerPoint file (only on a PC), you should click Save Options in the “Save As …” dialog window. Then, select the “Embed TrueType fonts” check box and press “OK.” Now, your presentation will keep the font file and your fonts will not change when you move computers (unless you give your presentation on a Mac).
11) Save your slides as JPEGs.
In PowerPoint for Mac 2011, there is no option to embed fonts within the presentation. So unless you use ubiquitous typefaces like Arial or Tahoma, your PPT is likely going to encounter font changes on different computers.
The most certain way of avoiding this is by saving your final presentation as JPEGs, and then inserting these JPEGs onto your slides. On a Mac, users can easily drag and drop the JPEGs into PPT with fast load time. If you do not use actions in your presentation, then this option works especially well.
If you want your presentation to appear “animated,” you’ll need to do a little tinkering. All you need to do is save JPEGs of each “frame” of the animation. Then, in your final presentation, you’ll just display those JPEGs in the order you’d like the animation to appear. While you’ll technically have several new slides in place of one original one, your audience won’t know the difference.
An important consideration: If your PPT includes a lot of JPEGs, then the file size will increase.
12) Embed multimedia.
PowerPoint allows you to either link to video/audio files externally or to embed the media directly in your presentation. You should embed these files if you can, but if you use a Mac, you cannot actually embed the video (see note below). For PCs, two great reasons for embedding are:
- Embedding allows you to play media directly in your presentation. It will look much more professional than switching between windows.
- Embedding also means that the file stays within the PowerPoint presentation, so it should play normally without extra work (except on a Mac).
Note: Mac OS users of PowerPoint should be extra careful about using multimedia files.
If you use PowerPoint for Mac, then you will always need to bring the video and/or audio file with you in the same folder as the PowerPoint presentation. It’s best to only insert video or audio files once the presentation and the containing folder have been saved on a portable drive in their permanent folder. Also, if the presentation will be played on a Windows computer, then Mac users need to make sure their multimedia files are in WMV format. This tip gets a bit complicated, so if you want to use PowerPoint effectively, consider using the same operating system for designing and presenting, no matter what.
13) Bring your own hardware.
Between operating systems, PowerPoint is still a bit jumpy. Even between differing PPT versions, things can change. One way to fix these problems is to make sure that you have the right hardware — so just bring along your own laptop when you’re presenting.
14) Use “Presenter View.”
In most presentation situations, there will be both a presenter’s screen and the main projected display for your presentation. PowerPoint has a great tool called Presenter View, which can be found in the “Slide Show” tab of PowerPoint 2010 (or 2011 for Mac). Included in the Presenter View is an area for notes, a timer/clock, and a presentation display.

For many presenters, this tool can help unify their spoken presentation and their visual aid. You never want to make the PowerPoint seem like a stack of notes that you use a crutch. Use the Presenter View option to help create a more natural presentation.
Pro Tip: At the start of the presentation, you should also hit CTRL + H to make the cursor disappear. Hitting the “A” key will bring it back if you need it!
Conclusion
With style, design, and presentation processes under your belt, you can do a lot more with PowerPoint than just presentations for your clients. PowerPoint and similar slide applications are flexible tools that should not be forgotten.
Additional Resources:
- Free Download: 3 Free PowerPoint Presentation Templates
- Blog Post: 25 of the Best PowerPoint Presentation Examples Every Marketer Should See
Editor’s Note: This post was originally published in 2013 and has been updated for accuracy and comprehensiveness.